With the infusion of digital media in different public sectors across Pakistan, it has now become convenient to proceed with important tasks online. From paying utility bills to the verification of licenses and CNIC, everything has been shifted to digital platforms in order to facilitate the public at best. Have you been looking forward to knowing how to verify CNIC online with NADRA? Here we have got an easy yet complete guide to follow!
How To Verify CNIC Online With NADRA?
Now it is all convenient to get your CNIC verified online with National Database and Registration Authority. All you need to do it follow this stepwise guide to get your CNIC verified online.
How Online CNIC Verification Works?
This online CNIC verification system is an online portal where you can create an account to avail different NADRA services. These services include applying for Child Registration Certificate or for the Family Registration Certificate.
For verification of CNIC online, read these instructions and follow the steps!
Step 1
To verify your CNIC through online service, the first step is to create an account on the website.
Step 2
Open the link https://id.nadra.gov.pk/e-id/authenticate.
Step 3
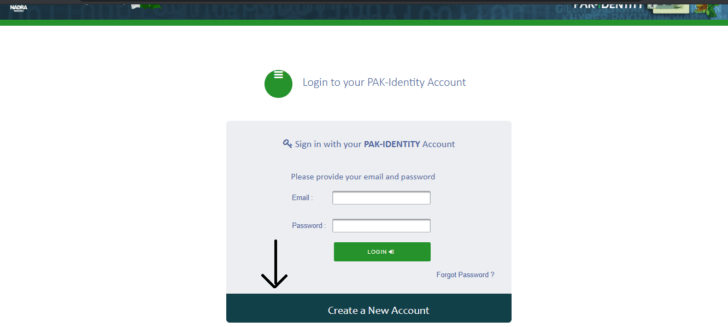
Click on ‘Create a New Account’.
Step 4
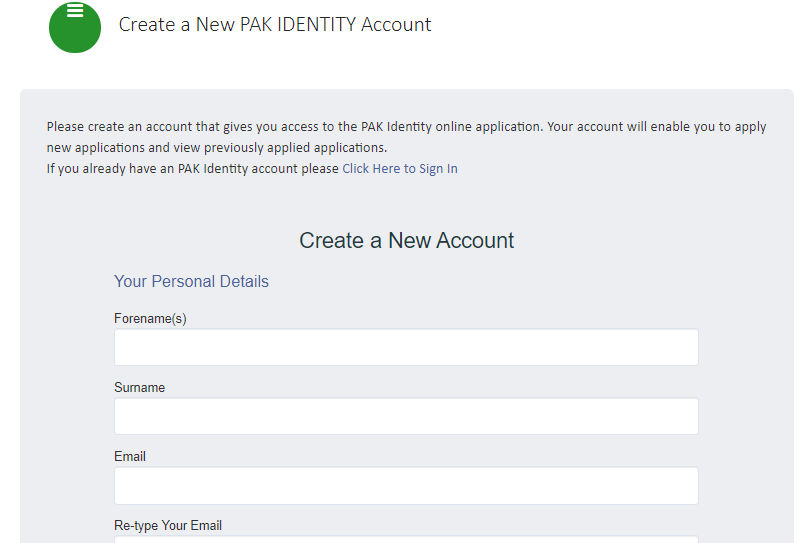
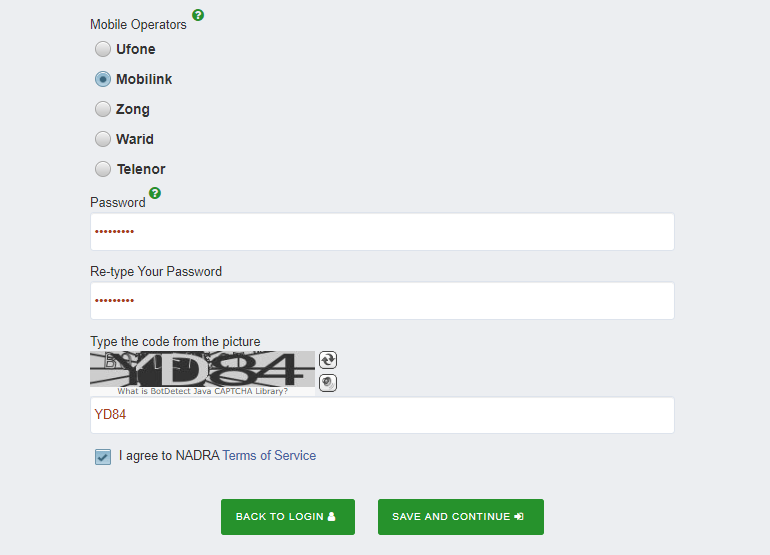
To proceed further, you have to fill out a form and provide all the details such as your name, mobile number, Date of Birth etc.
Step 5
After getting done with filling up the form with all required information, now you need to click on ‘save and continue’.
Step 6
A verification code will be sent to you via email or SMS. Don’t ignore this message as it will lead you to the next step in verification.
Step 7
Now, enter the code and click on ‘Verify’.
Step 8
After clicking on the verify, you will be automatically redirected to the login page.
Step 9
Once you’re done with the account registration process, now you have to log-in to your account to avail the online services. To do that, enter the email and password and click on ‘login’.
How To Proceed With CNIC Online Verification After Logging In?
Now follow these easy steps to proceed with CNIC online verification after logging into your NADRA account:
Step 1
After logging in, you need to accept the terms and conditions of the service. Select the “I have read and accept the terms and conditions” box by clicking on it.
Step 2
Now click on ‘Accept and Continue’.
Step 3
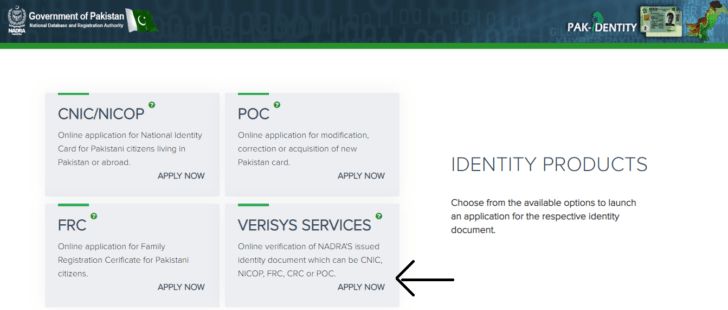
In the next step, you will see different options on the screen. These options include applying for CNIC online, Family Registration Certificate, and Verisys services.
Step 4
From all of these available options, all you need to do is click on ‘Verisys Services’.
Step 5
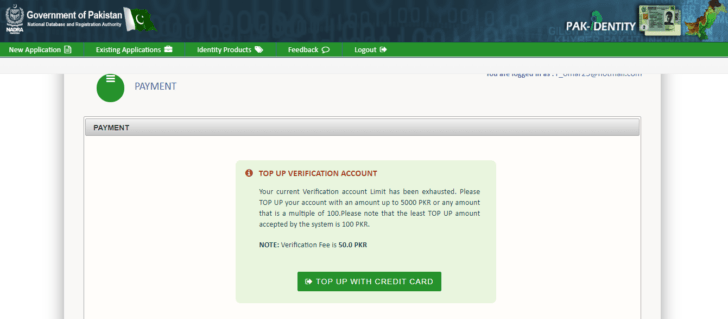
On the next screen, you will see a request to top up your account using the credit/debit card or by using ‘NADRA e-Sahulat’ service.
Step 6
After paying the fee with your debit or credit card, you shall have to fill in the required details.
Step 7
The next step is to sign the declaration to proceed further.
Step 8
After completing all of these easy steps and signing the declaration, you will be able to view all the desired information.
Why We Should Go For NADRA Online Service?
As this era has introduced different innovative ways to facilitate people in a better way, NADRA has also stepped forward in this regard. Taking a flashback to the recent old practices makes us remember citizens standing in the long queues waiting for their turn. It was not only something exhausting but also wasted the whole day.
This online service has though made things quick and convenient. With this online system, people living in Pakistan and/or abroad can get an ID card or any other identification document at their doorstep. No more queues and wait for long hours as it is now just a few clicks away online. So, if you have been worried about how to verify CNIC online using NADRA online portal, this guide is going to make it all easy for you.

